

 English
Zhongchi
Zhongchi
Zhongchi
Zhongchi
Zhongchi
Zhongchi
Zhongchi
Zhongchi
Zhongchi

When testing newly installed piping systems, the pipes and valves must first undergo preliminary testing: two leakage tests, a 150% hydrostatic test and an N₂He (nitrogen and helium) leakage test. These tests cover not only the flanges connecting the valves and pipes, but also the interfaces between the bonnet and the valve body, as well as all plug/spool components within the valve body.
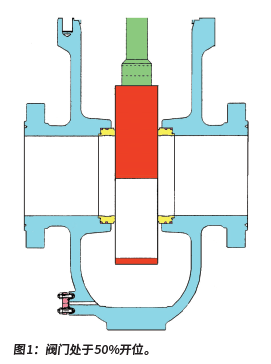
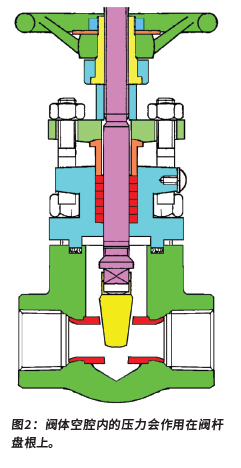
To ensure that the cavities within parallel gate valves or ball valves are fully pressurised during testing, the valves should be positioned at 50% open, as shown in Figure 1. So far, everything appears normal, but is this really feasible for the most commonly used globe valves and wedge gate valves? If these two types of valves are positioned in a half-open state, as shown in Figure 2, the pressure within the cavity will act upon the valve stem packing. The stem packing is usually made of graphite. When testing at 150% of the design pressure using small-molecule gases such as helium, it is usually necessary to tighten the pressure bonnet bolts in order to obtain normal test results.
However, the problem with this method is that it may put excessive pressure on the packing, thereby increasing the force required to operate the valve. As friction increases, so does the rate of wear on the packing during operation.
Serious Damage
If the valve is not positioned against the upper seal seat, tightening the pressure bonnet may cause the valve stem to tilt. A tilted valve stem may scrape against the bonnet during operation, resulting in scratches.
If incorrect operation during initial testing results in leakage from the valve stem packing, the common practice is to tighten the pressure valve cover further. However, this may cause severe damage to the pressure valve cover and/or the gland bolts. Figure 4 illustrates a case where excessive torque was applied to the gland nuts/bolts, resulting in the pressure valve cover becoming warped. If excessive stress is applied to the pressure valve cover, it may also cause the valve cover bolts to snap, as shown in Figure 5.
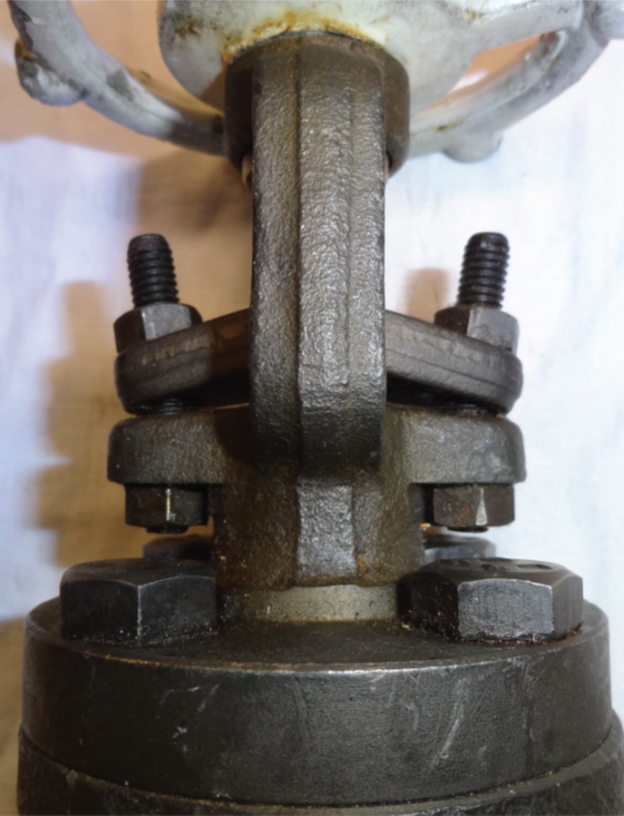
Figure 4: The valve cover nuts/bolts have been tightened to an excessive torque, causing the pressure valve cover to bend and deform.

Figure 5: The valve cover bolt has snapped.
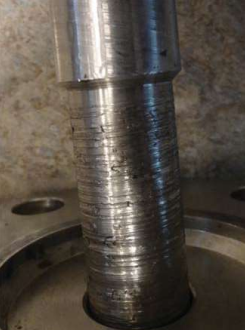
Figure 6: A misaligned valve stem can cause scratches, leading to severe leakage.
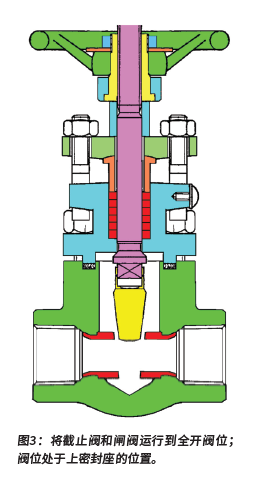
Figure 3 illustrates the best method for avoiding the above situation. When conducting preliminary tests, operate the valve to the fully open position, i.e. the position where the valve is at the upper seal seat.
Then loosen the nuts on the pressure bonnet to relieve the pressure acting on the valve stem packing. Conducting preliminary tests under these conditions will reveal any issues with the valve stem and/or bonnet seals. If the upper seal seat performs poorly, consider replacing the valve. In summary, the upper seal should be a proven metal-to-metal seal.
Two points worth noting
After completing the preliminary test, it is necessary to apply an appropriate compressive stress to the stem packing, whilst ensuring that the packing does not exert excessive stress on the valve stem. This will prevent excessive wear on the valve stem and maintain the normal service life of the packing. Two points are worth noting: firstly, compressed graphite packing will not return to its pre-compression state even when external pressure is removed; consequently, leakage will occur once the compressive stress is relieved. Secondly, when tightening the valve stem packing, ensure that the valve is positioned at the upper seal seat. Otherwise, the compression of the graphite packing may be uneven, causing the valve stem to tilt, which in turn may result in surface scuffing of the valve stem and severe leakage from the packing, as shown in Figure 6. Such valves must be replaced.